Repair It-Don’t Replace It-Concrete Steps
NOVEMBER 2, 2011 BY GREEN BUILDING DESIGN AND CONSTRUCTION
Repairing Concrete Steps instead of Replacing-Job Notes, Suggestions, and Hints.
Whether it is downturn of economy or people choosing to save money, many of my clients are choosing to “Repair rather than Replace” the materials used in the construction of their home or business.
If you decide that this type of DIY concrete repair is more than you can handle on your own. Scotts Contracting is available to assist you in your project. Fill in the form (provided below) and Scotty will respond asap to your request.
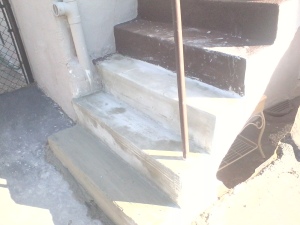
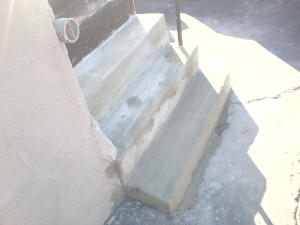
In the photos you can see:
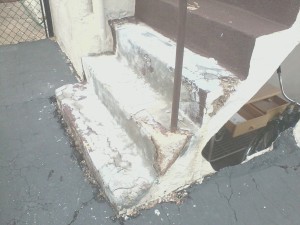
- How the prior concrete patch job had deteriorated and made the Concrete Steps a Safety Issue for the homeowner.
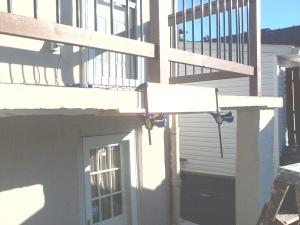
- Quick and Easy Concrete Form for Repairing Concrete Walkway
- Materials used to Repair / Resurface the Concrete Steps (Home Depot Products)
- Rapid Set Cement – Multi-Purpose Construction Material
- Quikrete 1-Gallon Concrete Bonding Adhesive
- Quikrete 1 qt. Acrylic Fortifier
- Concrete Reinforcing-#4 Rebar- 1/2 in.
- Tools needed to accomplish Concrete Step Repair
- Darby
- Hammer-Drill w/ 1/2 Concrete Bit and Flat Bit
- Concrete Floats and Edgers
- Screw Gun
- Clamps
- Wire Brush
- Buckets
- Broom/Brush
Before Photos of Concrete Step and Walkway Repair
Photo 1)
Photo clearly shows how the prior concrete patch had deteriorated into an unsafe and hazardous condition.
Question: Why did the prior concrete patch fail?
Answer: To the best of my knowledge whomever did the prior patch did not use:
1) Surface Bonding agent and
2) Concrete Additive to form a tight bond against the elements and use
3) Prior to patching the area may not have been cleaned which allowed the patch to work loose in time
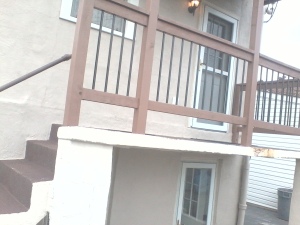
Photo 2)
Photo 3)
Inexpensive Concrete Form used to repair edge of Concrete Walkway.
1) Concrete Form consisting of 2- 1×4 or 1×6 Screwed together and clamped to edge of Walkway
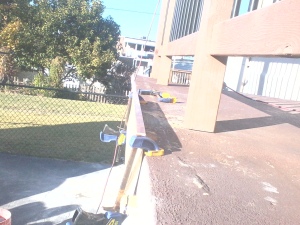
Photo 4)
Edge View of Concrete poured into the Concrete Form used to repair edge of Walkway
Note: Before concrete was poured into the form it is suggested by the manufacture to:
1) Clean Area completely of any substances that will inhibit the new concretes adhesion properties.
2) After cleaning and prepping area: Apply a surface bonding agent (Concrete Glue) to the area with an old paint brush; carefully working the Adhesive into all cracks and crevices.
Photo 5)
Notes:
Photo 6)
Notes: Notice how the Fast Dry Cement Patch is drying ( white areas compared to grey area )
Broom finish used for traction on the steps and the finished texture
Photo 7)
This photo was included to point out the transition between the Step and Landing zone. The area was filled with concrete to inhibit future seep-age of water from entering the area and further deteriorating the Foundation of the Home.
Hints and Suggestions:
- To increase the life expectancy of this concrete patch and increase the adhesive properties. (A)An acrylic bonding agent was used in the mixture of Concrete and Water. (B) Surface Bonding Agent applied to clean surfaces before patch was installed. The working time for the patch will be under 15 mins. Only mix enough patch to work small areas ( 1/4 of a 5 Gal Bucket at a time )
- When repairing steps if at all possible start at the top step and work down
- Clean Hand Trowels often to remove adhesive from the Acrylic Agent for a smooth finish that can later be worked into the finished texture (Broom Finish or Swirl Finish)
If you decide that this type of DIY concrete repair is more than you can handle on your own. Scotts Contracting is available to assist you in your project. Fill in the form (provided below) and Scotty will respond asap to your request.
Related articles
- How to Repair Water Damaged Stucco – Interior(scottscontracting.wordpress.com)
- Resurfacing Old Cocrete to Look New Again(theconcreteprofessor.com)
- ECO CONSCIOUS, GREEN BUILD TAGGED WITH CONCRETE, CONCRETE REPAIR, CONCRETE STEP REPAIR, CONSTRUCTION AND MAINTENANCE, HINTS, MATERIALS AND SUPPLIES, REBAR, SCOTTS CONTRACTING
If you are interested in Green Building on an Investment Property Check out the Benton Gut Rehab Blog Series-Benton Gut Rehab Green Blog Series
Part 8: 1st Floor Weatherization
Part 9: See the Difference a Little White Paint Makes
Part 10: Interior Framing-Plumbing-Laundry Room
Part 11: Kitchen Framing Tip #36-Benton Rehab Project
Part 12: Water Main Repair- Benton Rehab
Part 13: Benton Rehab Project Drywall Installation and Tip: Number 1172
Green-Sustainable Design-Construction Service for Home and Business- Repair and Improvements for St Louis, Green Products,Insulation, Weatherization, Solar, Home Improvement. My Green Dream is to build a GREEN St Louis find green news at: http://stlouisrenewableenergy.blogspot.com or http://scottscontracting.wordpress.com

