-- Scotts Contracting - StLouis Renewable Energy

Search This Blog

11.01.2011

Repairing Concrete Steps-Hints-Suggestions-Photos


Repair It-Don’t Replace It-Concrete Steps

Repairing Concrete Steps instead of Replacing-Job Notes, Suggestions, and Hints.

Whether it is downturn of economy or people choosing to save money, many of my clients are choosing to “Repair rather than Replace” the materials used in the construction of their home or business.

If you decide that this type of DIY concrete repair is more than you can handle on your own.  Scotts Contracting is available to assist you in your project.  Fill in the form (provided below) and Scotty will respond asap to your request.

In the photos you can see:

  1. How the prior concrete patch job had deteriorated and made the Concrete Steps a Safety Issue for the homeowner.
  2. Quick and Easy Concrete Form for Repairing Concrete Walkway
  3. Materials used to Repair / Resurface the Concrete Steps (Home Depot Products)


    • Rapid Set Cement – Multi-Purpose Construction Material
    • Quikrete 1-Gallon Concrete Bonding Adhesive
    • Quikrete 1 qt. Acrylic Fortifier
    • Concrete Reinforcing-#4 Rebar- 1/2 in.
  4. Tools needed to accomplish Concrete Step Repair
    • Darby
    • Hammer-Drill w/ 1/2 Concrete Bit and Flat Bit
    • Concrete Floats and Edgers
    • Screw Gun
    • Clamps
    • Wire Brush
    • Buckets
    • Broom/Brush
Before Photos of Concrete Step and Walkway Repair
Photo 1)
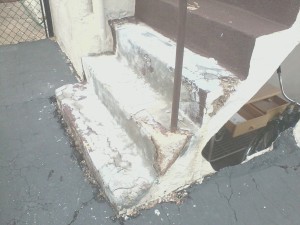
Before Photo of Concrete Step Repair
Photo clearly shows how the prior concrete patch had deteriorated into an unsafe and hazardous condition.
Question: Why did the prior concrete patch fail?
Answer: To the best of my knowledge whomever did the prior patch did not use:
1) Surface Bonding agent and
2) Concrete Additive to form a tight bond against the elements and use
3) Prior to patching the area may not have been cleaned which allowed the patch to work loose in time


Photo 2)
Concrete Walk Repair
Before Walkway Repair


Photo 3)
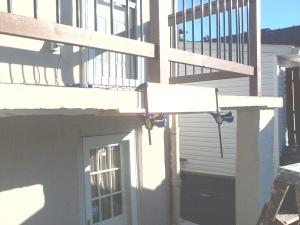
Concrete Form for Repairing Concrete Walkway
Inexpensive Concrete Form used to repair edge of Concrete Walkway.
1) Concrete Form consisting of 2- 1×4 or 1×6 Screwed together and clamped to edge of Walkway


Photo 4)
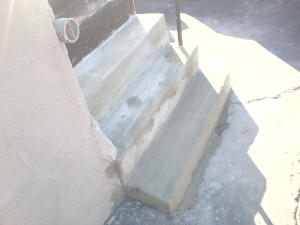
Concrete Form for Repairing Concrete Walkway #2
View #2 Edge View for Concrete Form for Repairing Edge of Concrete Walkway
Edge View of Concrete poured into the Concrete Form used to repair edge of Walkway
Note: Before concrete was poured into the form it is suggested by the manufacture to:
1) Clean Area completely of any substances that will inhibit the new concretes adhesion properties.
2) After cleaning and prepping area: Apply a surface bonding agent (Concrete Glue) to the area with an old paint brush; carefully working the Adhesive into all cracks and crevices.


Photo 5)
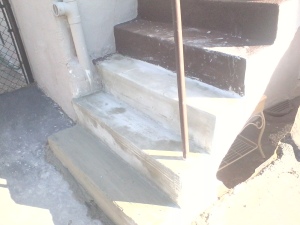
Repaired Concrete Step
Notes:


Photo 6)
Close Up of Repaired Concrete Step
Notes: Notice how the Fast Dry Cement Patch is drying ( white areas compared to grey area )
Broom finish used for traction on the steps and the finished texture


Photo 7)
View #2 After Repair
This photo was included to point out the transition between the Step and Landing zone.  The area was filled with concrete to inhibit future seep-age of water from entering the area and further deteriorating the Foundation of the Home.


Hints and Suggestions:
  1. To increase the life expectancy of this concrete patch and increase the adhesive properties.  (A)An acrylic bonding agent was used in the mixture of Concrete and Water. (B) Surface Bonding Agent applied to clean surfaces before patch was installed.   The working time for the patch will be under 15 mins.  Only mix enough patch to work small areas ( 1/4 of a 5 Gal Bucket at a time )
  2. When repairing steps if at all possible start at the top step and work down
  3. Clean Hand Trowels often to remove adhesive from the Acrylic Agent for a smooth finish that can later be worked into the finished texture (Broom Finish or Swirl Finish)

If you decide that this type of DIY concrete repair is more than you can handle on your own.  Scotts Contracting is available to assist you in your project.  Fill in the form (provided below) and Scotty will respond asap to your request.


Part 8: 1st Floor Weatherization

Part 9: See the Difference a Little White Paint Makes

Part 10: Interior Framing-Plumbing-Laundry Room

Part 11: Kitchen Framing Tip #36-Benton Rehab Project

Part 12: Water Main Repair- Benton Rehab

Part 13: Benton Rehab Project Drywall Installation and Tip: Number 1172

Author Green Building Design and Construction
Green-Sustainable Design-Construction Service for Home and Business- Repair and Improvements for St Louis, Green Products,Insulation, Weatherization, Solar, Home Improvement. My Green Dream is to build a GREEN St Louis find green news at: http://stlouisrenewableenergy.blogspot.com or http://scottscontracting.wordpress.com

10.31.2011

Senate Bill 321 =Nuclear Energy Rate Hike Bill


that has migrated into other bills allows Ameren Missouri to raise electric customer rates $45 million to subsidize an early site permit for a second nuclear reactor.
  
MCE opposes any legislation allowing investor-owned utilities, like Ameren Missouri, to erode the ban against charging ratepayers for a power plant before it is operational. The ban on "Construction Work in Progress" charges or CWIP has protected Missouri ratepayers since voters passed it in 1976. Language circulating in Jefferson City by Senator Mike Kehoe and Rep. Jeanie Riddle gives Ameren Missouri the ability to raise electricity rates $45 million now for an "early site permit" for a second nuclear reactor. The $45 million rate hike creates no jobs, provides no service, and the reactor may never be built. Socializing the financial risk of nuclear power for a corporation's private profits does not serve Missourians' interests. 

You can help by calling your legislators and urging them to oppose Ameren Missouri's $45 million rate hike for an early site permit. Learn more at www.nocwip.org.


--
*Scott's Contracting*

Green Me UP-Scotty <http://greenmeupscotty.wordpress.com>
scottscontracting@gmail.com
http://stlouisrenewableenergy.blogspot.com
http://scottscontracting.wordpress.com
http://twitter.com/StLHandyMan
https://www.facebook.com/GreenMeUPScotty


Solar power is beginning to go mainstream – USATODAY.com

Solar power installations doubled in the United States last year and are expected to double again this year. More solar energy is being planned than any other power source, including nuclear, coal, natural gas and wind.

"We are at the beginning of a turning point," says Andrew Beebe, who runs global sales for Suntech Power, a manufacturer of solar panels.

Solar's share of the power business remains tiny. But its promise is great. The sun splashes more clean energy on the planet in one hour than humans use in a year, and daytime is when power is needed most. And solar panels can be installed near where people use power, reducing or eliminating the costs of moving power through a grid.

Solar power is beginning to go mainstream – USATODAY.com

10.29.2011

Fire Proof-Air Tight-Electrical Junction Box Cover


Air Sealing a Ceiling Electrical Junction Box

CAD Design-Weatherize-Insulate-Fire Block-Electrical Junction Box
Air Sealing Ceiling Electrical Junction Box
CAD Diagram explains how to Build and Air Tight Electrical Junction Box located in most Attics

Sealing Air Leaks

Warm air leaking into your home during the summer and out of your home during the winter and can waste a lot of your energy dollars. One of the quickest dollar-saving tasks you can do is caulk, seal, and weatherstrip all seams, cracks, and openings to the outside.


You can save on your heating and cooling bill by reducing the air leaks in your home.

Fire Proof /Air Tight Electrical Junction Box Cover used in Attics

Hint: Use Fire Rated: 5/8″Fire Rated Drywall or Sheetrock with Fire Proof Caulking to 

Create the Air Tight Seal

Tips for Sealing Air Leaks

re-posted from:http://www.energysavers.gov/tips/insulation_sealing.cfm
Pie chart shows how air escapes from a typical home: 31% floors, ceiling, walls; 15% ducts; 14% fireplace; 13% plumbing penetrations, 11% doors; 10% windows; 4% fans and vents; 2% electric outlets.How Does the Air Escape?
Air infiltrates into and out of your home through every hole and crack. About one-third of this air infiltrates through openings in your ceilings, walls, and floors.
  • First, test your home for air tightness. On a windy day, carefully hold a lit incense stick or a smoke pen next to your windows, doors, electrical boxes, plumbing fixtures, electrical outlets, ceiling fixtures, attic hatches, and other locations where there is a possible air path to the outside. If the smoke stream travels horizontally, you have located an air leak that may need caulking, sealing, or weatherstripping.
  • Caulk and weatherstrip doors and windows that leak air.
  • Caulk and seal air leaks where plumbing, ducting, or electrical wiring penetrates through walls, floors, ceilings, and soffits over cabinets.
  • Install foam gaskets behind outlet and switch plates on walls.
  • Look for dirty spots in your insulation, which often indicate holes where air leaks into and out of your house. You can seal the holes with low-expansion spray foam made for this purpose.
  • Look for dirty spots on your ceiling paint and carpet, which may indicate air leaks at interior wall/ceiling joints and wall/floor joists. These joints can be caulked.
  • Install storm windows over single-pane windows or replace them with more efficient windows, such as double-pane. See Windows on page 18 for more information.
  • When the fireplace is not in use, keep the flue damper tightly closed. A chimney is designed specifically for smoke to escape, so until you close it, warm air escapes—24 hours a day!
  • For new construction, reduce exterior wall leaks by installing house wrap, taping the joints of exterior sheathing, and comprehensively caulking and sealing the exterior walls.
  • Use foam sealant around larger gaps around windows, baseboards, and other places where warm air may be leaking out.
  • Kitchen exhaust fan covers can keep air from leaking in when the exhaust fan is not in use. The covers typically attach via magnets for ease of replacement.
  • Replacing existing door bottoms and thresholds with ones that have pliable sealing gaskets is a great way to eliminate conditioned air leaking out from underneath the doors.
  • Fireplace flues are made from metal, and over time repeated heating and cooling can cause the metal to warp or break, creating a channel for hot or cold air loss. Inflatable chimney balloons are designed to fit beneath your fireplace flue during periods of non-use. They are made from several layers of durable plastic and can be removed easily and reused hundreds of times. Should you forget to remove the balloon before making a fire, the balloon will automatically deflate within seconds of coming into contact with heat.
Cutaway house illustration showing areas of home where air leaks. Refer to caption for list.Sources of Air Leaks in Your Home
Areas that leak air into and out of your home cost you lots of money. Check the areas listed below.
  1. Dropped ceiling
  2. Recessed light
  3. Attic entrance
  4. Sill plates
  1. Water and furnace flues
  2. All ducts
  3. Door frames
  4. Chimney flashing
  1. Window frames
  2. Electrical outlets and switches
  3. Plumbing and utility access
Scotts Contracting is available to assist you in improving your Home or Business Energy Demands.  Please use this form below to Contact Scotty, Scotts Contracting to schedule a FREE Energy Analysis for your Property.

Connect with Scotts Contracting

FB FB Twitter LinkedIn Blog Blog Blog Blog Pinterest